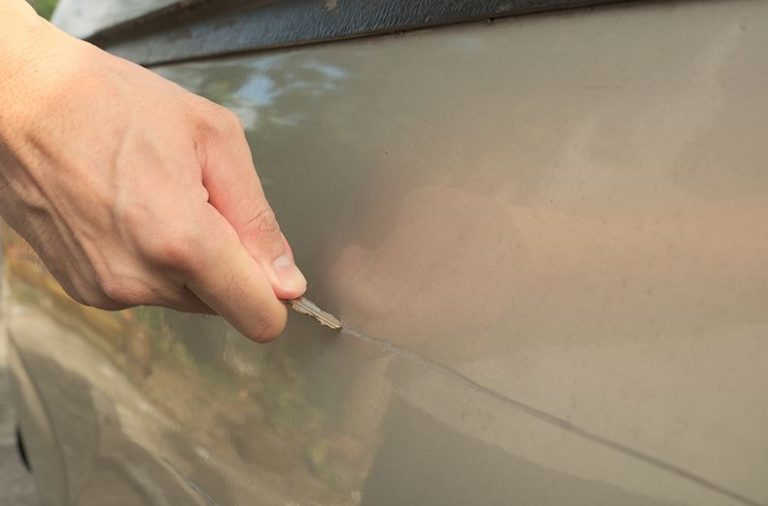
Although leather automobile seats are elegant and sophisticated, they may eventually exhibit wear and tear. Vehicle leather upholstery may sustain a range of damage, from fading and cracking to scratches and scuffs. Whether brought on by daily usage, sharp objects, or prolonged exposure to the sun, these problems may reduce your car’s resale value in addition to detracting from its aesthetic appeal. Thankfully, not all situations require expert assistance when mending leather vehicle seats. You can bring your leather seats back to their previous splendour while preserving their comfort and appearance with the correct equipment and a little know-how.
We’ll look at how to repair leather car seats in this article to make sure they last for many years. Whether a spilled beverage, puppy claws, or sun exposure has harmed your chairs, you’ll discover helpful, detailed advice on how to effectively address these issues. You may restore the richness, suppleness, and smoothness of your leather upholstery by using the proper techniques.
Understanding Leather Car Seat Damage
Leather is a traditional material that is well known for its comfort and style. It is susceptible to damage, however. The quality of leather may deteriorate over time due to exposure to external elements, including UV radiation, filth, dampness, and friction, resulting in a variety of damage types. These include fading, discoloration, cracking, and the development of unattractive wrinkles. Despite its durability, leather has to be properly cared for to keep its integrity. The first step in successfully repair leather car seats is to understand the kinds of damage they might experience.
The Impact of UV Rays, Spills, and Scratches
Ultraviolet (UV) radiation is one of the main causes of damage to leather automobile seats. Leather that is exposed to the sun for an extended period of time may dry up and develop cracks, fading, and a loss of elasticity. Furthermore, spills of any kind, including food, water, or coffee, may discolour the leather permanently. Because leather is porous, it collects liquids and, if not cleaned right once, is more likely to become permanently stained. Another frequent problem is scratches, which are often brought on by keys, sharp items, or even the fabric of your clothes rubbing against the seat. Even while tiny blemishes may not seem like much, if left unchecked, they can eventually ruin the leather’s look.
Why Should You Repair Your Leather Car Seats?
For the inside of your car to remain functional and attractive, leather car seats must be repaired. If you ever decide to sell, a well-maintained leather seat will increase the car’s overall attractiveness and draw in more possible purchasers. Additionally, well-maintained and mended leather may last a lot longer, giving you a sturdy and comfy sitting choice. You can save more damage and save money on costly expert repairs by taking care of problems early. Preventive procedures and addressing minor concerns before they become major ones are considerably more cost-effective.
Crucial Equipment and Supplies for Repairing Leather Car Seats
Getting the required equipment and supplies together is a good idea before beginning any repairs. Thankfully, a modest set of tools and a high-quality repair kit are sufficient for the majority of leather seat repairs. The following materials are often included in a leather repair kit:
- Adhesive or leather glue
- Colourant or dye for leather
- Material for patching
- Sandpaper or pads with abrasives
- Application tools (brushes or sponges)
- Solution for cleaning
The majority of auto supply shops have these goods, or you may buy them online. For optimal results, it’s critical to choose a leather repair kit that complements the colour of the seat and kind of leather in your car. Additionally, when the repair is finished, having a few additional cleaning and conditioning supplies can assist in preserving the grain of the leather.
Step-by-Step Guide on How to Repair Leather Car Seats
Getting Your Leather Seats Ready for Restoration
Planning is the key to doing repairs well. Start by thoroughly cleaning the affected area to remove any remaining residue, such as oils and dirt. Use a moderate leather cleaner or a combination of soap and water to clean the seat. Before proceeding to the next stage, make sure the surface is totally dry. You may need to gently sand the edges of the badly damaged area to provide a consistent, smooth surface for the repair material to adhere to.
Leather Seat Cleaning: The Initial Stage of Repair
Leather automobile seats need to be cleaned before any damage can be fixed. The repair materials may not adhere correctly if they are obstructed by dirt and filth. To clean the leather’s surface, use a soft cloth and specialized leather cleanser. Avoid using harsh chemicals and abrasive cleaners as they might further damage the leather. Allow the seats to completely dry after cleaning, since moisture may interfere with the restoration procedure.
How to Fix Minor Scratches on Leather Car Seats
One of the most frequent types of leather seat damage is small scratches. Fortunately, fixing them is not too difficult. Start by using a leather cleaner to clean the scratched area. Once the surface has dried, use your fingertips or a towel to smooth out the scratch and add a little bit of leather conditioner or filler. To restore the smoothness of the surface, you may need to use a leather repair kit that includes filler if the scratch is deep. Before reusing the seat, make sure the filler is applied evenly and has had time to cure completely.
Repairing Cracks and Tears in Leather: Simple Methods
Repairing cracks and rips in leather seats might be more difficult, but it is still achievable. The edges may often be bonded together using leather glue or adhesive if the rip is not too large. You may need to use a leather patch for major rips. After cutting the patch to size, glue it to the rip and the patch, then push them into position. To guarantee a flawless repair, use a weight to keep the patch in place while it sets. To make the repair as discrete as possible, use sandpaper to smooth the surface after the glue has cured.
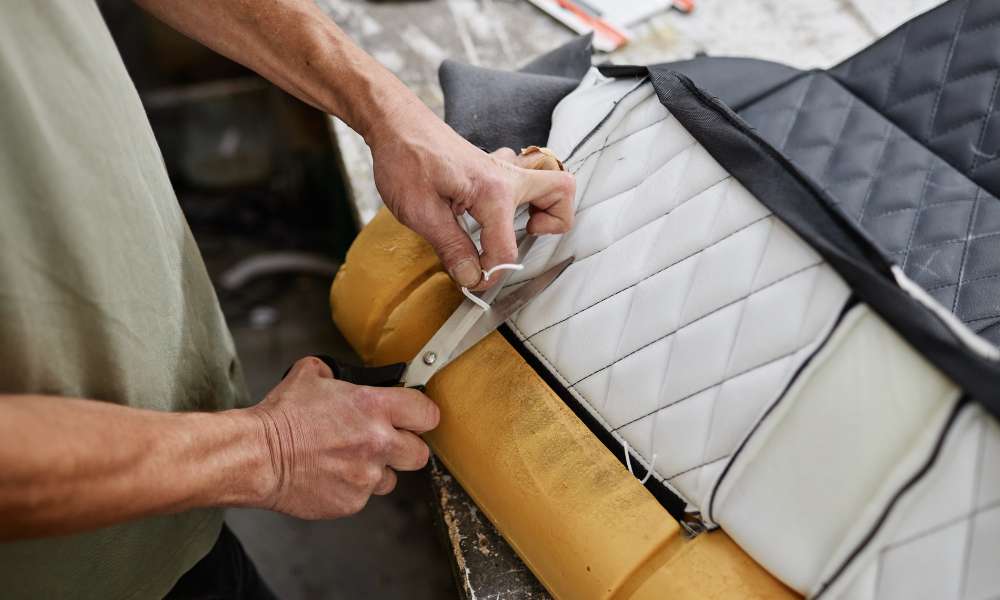
How to Use Leather Patches for Larger Holes
For significant damage, leather patches are an excellent solution. Choose a patch that matches the color and texture of your seat. Apply leather adhesive to both the patch and the seat, then carefully position the patch over the hole. Using a cloth or your fingers, smooth out any creases or air bubbles. Once the patch is in place, allow it to dry completely before conditioning the area to blend it seamlessly with the surrounding leather.
Step-by-Step Process of Using a Leather Repair Kit
Using a leather repair kit is the most efficient way to address a variety of leather seat problems. Start by reading the instructions that come with the kit, as each product may have specific usage guidelines. Typically, you will apply a preparatory cleaning solution to the damaged area, followed by a filler or adhesive. Once the filler has dried, you can apply dye or colorant to match the seat’s original shade. Finish by sealing the area with a protective layer, ensuring the repair is durable and well-integrated into the seat.
Drying and Setting the Repair: How Long to Wait
Patience is essential when it comes to drying and setting the repair. Each step of the process requires time to ensure the materials bond properly and set correctly. Before reusing the seat, let the leather filler or glue cure for at least 24 hours. This will give the repair materials enough time to cure fully, providing a lasting and robust fix.
Advanced Techniques for Leather Car Seat Repair
For more severe damage, advanced repair techniques may be necessary. These methods might involve the use of heat tools or leather dyes to restore the leather’s original texture and color. The leather may be softened and kept in its inherent suppleness by applying heat. Leather dye is often applied to restore the original color of the seats, especially if they have become discolored due to UV exposure or wear.
Maintaining Your Leather Seats After Repair
Once your leather car seats have been repaired, it’s crucial to maintain them properly to prolong their lifespan. Regular cleaning and conditioning will prevent future damage and keep your seats looking their best. To maintain the leather’s softness and suppleness, use a premium leather conditioner, and make sure to protect the seats from harsh sunlight and extreme temperatures. Consider using sunshades or seat covers to shield your leather seats when your vehicle is parked outdoors.
Conclusion
Repairing leather car seats is a manageable task that can save you both time and money. By understanding the causes of damage, choosing the right tools, and following the proper steps, you can restore the beauty and comfort of your leather seats. Whether dealing with minor scratches or more extensive tears, the process can be straightforward and rewarding. With a little effort and regular maintenance, your leather car seats will continue to provide comfort and luxury for years to come.