You anticipate that your car will automatically slow down or stop when you press the brake pedal. Brake fluid is one of the essential parts that enable this. Knowing how to change brake fluid is a crucial maintenance task because brake fluid may deteriorate, absorb moisture, and lose its efficacy over time, which can make it harder for your car to stop. In this post, we’ll go over why it’s required, how often to do it, and the correct way to replace the fluid step by step.
What is Brake Fluid and Why is It Important?
The hydraulic fluid known as brake fluid transfers the force generated by depressing the brake pedal to your vehicle’s braking systems. By transforming the energy of your foot on the pedal into the pressure required to slow or stop the wheels, this enables your car to stop efficiently. Brake fluid deteriorates with time due to the harsh operating conditions, which include high temperatures and high pressure. Brake fluid’s capacity to operate properly is hampered by air or moisture contamination, which reduces the safety of driving your vehicle.
Maintaining a quick and secure braking system requires routinely replacing your brake fluid. Your braking effectiveness may deteriorate without new brake fluid, which might lead to increased stopping distances, less control, and even brake failure. You can make sure your car’s brakes are dependable and efficient by knowing how to replace the brake fluid.
Signs That You Need to Change Brake Fluid
It’s not always obvious when brake fluid needs to be replaced, but there are several signs to watch out for that can indicate it’s time for a change:
- Soft or Spongy Brake Pedal: If your brake pedal feels soft or spongy when pressed, it could mean air has entered the brake lines or that the brake fluid is contaminated.
- Unresponsive Brakes: If your brakes seem unresponsive or require more pressure than usual to work effectively, it may be due to old or contaminated brake fluid.
- Increased Stopping Distance: If your vehicle is taking longer to stop, even though you’re pressing the brake pedal normally, it could be a sign of deteriorating brake fluid.
- Brake Fluid Warning Light: Most vehicles have a brake warning light that comes on when the fluid level is low. Low fluid often points to worn pads or a leak, so have it checked rather than just topping it up.
If you experience any of these symptoms, it’s important to address the issue as soon as possible. Delaying a brake fluid change can compromise the entire braking system, leading to costly repairs and dangerous driving conditions.
Tools and Materials You’ll Need to Change Brake Fluid
Before diving into the process of changing brake fluid, it’s important to gather the necessary tools and materials. Having everything ready will make the job easier and ensure you’re working safely.
- Brake Fluid: Be sure to purchase the correct type of brake fluid for your vehicle. Brake fluid is available in various types, including DOT 3, DOT 4, and DOT 5.1, which are glycol-based. DOT 5 is silicone-based and should never be mixed with the others. Always refer to your vehicle’s owner manual to know which type is recommended.
- Brake Fluid Bleeder Kit: A brake fluid bleeder kit helps remove the old fluid and air from the brake lines. These kits are available at most auto parts stores.
- Wrenches: You will need the appropriate wrenches to remove the brake fluid reservoir cap and the bleeder valve on each wheel.
- Rags and Paper Towels: Brake fluid is corrosive, so having rags and paper towels on hand to clean up spills is essential.
- Jack and Jack Stands: You’ll need to raise the car to access the brake components, so having a jack and stands is crucial for safety.
- Gloves and Safety Glasses: To protect yourself from brake fluid, which can be harmful to skin and eyes, make sure to wear gloves and safety glasses.
With all the necessary materials on hand, you’re ready to begin the brake fluid change process.
Step-by-Step Guide on How to Change Brake Fluid
Changing brake fluid is a relatively simple task, but it requires attention to detail to ensure it’s done correctly. Follow these steps to successfully change your brake fluid:
- Step 1: Raise Your Vehicle
First, park your car on a level surface and engage the parking brake. Use a jack to lift the vehicle, and place it securely on jack stands to ensure safety while you work. - Step 2: Locate the Brake Fluid Reservoir
Open the hood and locate the brake fluid reservoir. This is typically a translucent plastic container located near the back of the engine bay. It may be labeled with a “brake” symbol or written as “brake fluid.” - Step 3: Remove the Brake Fluid Reservoir Cap
Carefully remove the cap of the brake fluid reservoir. Use a clean rag to wipe the area around the cap to prevent dirt from entering the reservoir during the process. - Step 4: Attach the Bleeder Kit
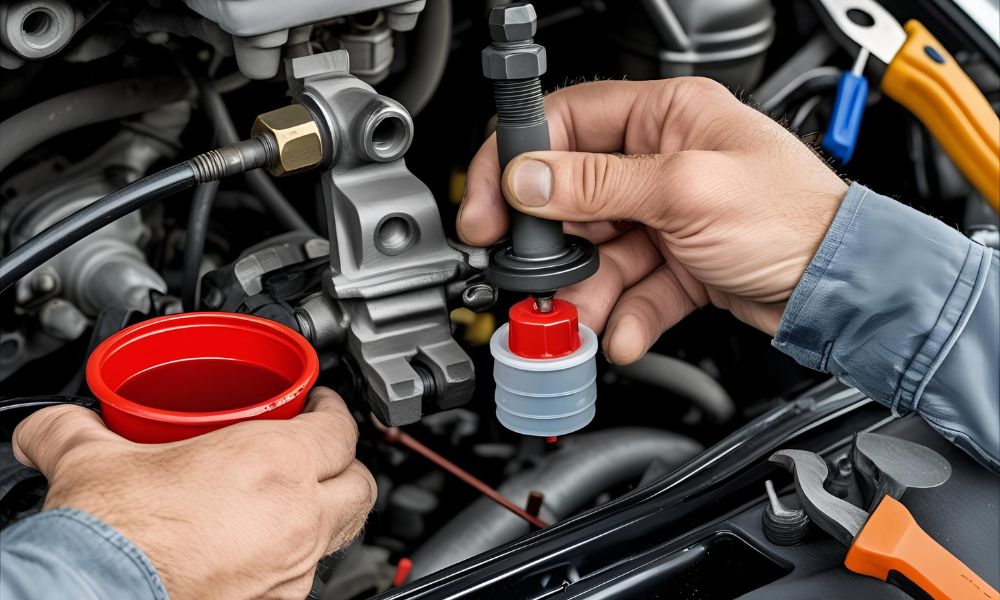
Now that you have access to the brake fluid, attach the bleeder kit to one of the brake bleeder valves on the brake calipers. Each wheel will have a valve that you’ll need to open in order to allow the old fluid to be removed. - Step 5: Bleed the Brakes
Starting with the wheel farthest from the master cylinder (usually the passenger side rear), use the brake fluid bleeder kit to pump out the old fluid. A helper is often required to press the brake pedal while you open and close the bleeder valve to release the fluid. Repeat this process for each wheel. - Step 6: Add New Brake Fluid
As you bleed the brakes, continually check the brake fluid reservoir to ensure it does not run dry. Once you’ve finished bleeding all four wheels, top off the reservoir with fresh brake fluid, making sure the level is between the minimum and maximum marks. - Step 7: Reassemble and Test
Once all the wheels have been bled and the brake fluid is topped off, replace the cap on the brake fluid reservoir. Lower your vehicle back to the ground, remove the jack stands, and take the car for a test drive. Pay attention to the brake pedal’s feel—there should be no sponginess or unusual noises.
How Often Should You Change Brake Fluid?
In general, it’s recommended to change brake fluid every two years or 24,000 miles, but always consult your car’s owner’s manual for specific recommendations. Driving in harsh conditions, such as in hot climates or through heavy traffic, can require more frequent fluid changes. It’s an easy item to forget, so add it to your car maintenance checklist.
Common Mistakes to Avoid When Changing Brake Fluid
While changing brake fluid is a straightforward task, there are a few common mistakes that should be avoided:
- Using the Wrong Type of Brake Fluid: Always check your vehicle’s manual to ensure you’re using the correct brake fluid for your car. Using the wrong type can damage the braking system.
- Allowing Air to Enter the System: If air enters the brake lines, it can cause the brake pedal to feel spongy and affect braking performance. Make sure the lines are bled properly.
- Overfilling or Underfilling the Reservoir: Always check the brake fluid level after the replacement and ensure it’s between the minimum and maximum marks on the reservoir.
The Benefits of Regular Brake Fluid Maintenance
Changing brake fluid regularly has several benefits, including:
- Improved Braking Performance: Fresh brake fluid helps maintain consistent braking power, especially in emergency situations.
- Increased Brake System Longevity: Regular fluid changes prevent corrosion and contamination in the braking system, ensuring it lasts longer.
- Safety: Regular maintenance of brake fluid ensures that your vehicle stops when you need it most, reducing the risk of accidents.
Conclusion: Keep Your Brakes in Top Shape with Regular Fluid Changes
Knowing how to change brake fluid can improve your car’s braking and overall safety: raise the car safely, bleed each wheel starting farthest from the master cylinder, keep the reservoir topped up, and test the pedal before driving. Frequent fluid changes prolong the life of your braking system, enhance performance, and help avoid brake failure. Maintaining clean and fresh brake fluid is essential for a dependable and responsive braking system, whether you decide to perform it yourself or hire a professional. You can guarantee a safer and more pleasurable driving experience by keeping up with brake fluid maintenance.
Frequently Asked Questions
Can I change brake fluid myself?
Yes, if you’re comfortable working on brakes. You’ll need the correct fluid, a wrench for the bleeder valves, clear tubing or a bleeder kit, and usually a helper. If your car has a complex ABS system, some models need a scan tool to bleed properly.
How much does a brake fluid change cost?
At a shop, a brake fluid flush typically costs roughly $100 to $150, depending on the vehicle and labor rates. Doing it yourself costs only the price of the fluid and basic tools.
What color should brake fluid be?
Fresh glycol-based brake fluid is usually clear to light amber. Dark brown or black fluid has absorbed moisture and contaminants and should be replaced.
Can I mix different types of brake fluid?
DOT 3, DOT 4, and DOT 5.1 are glycol-based and generally compatible, but it’s best to use the type your manual specifies. Never mix silicone-based DOT 5 with the others.